

|
User Profile
You need to click on option User Profile to see the options provided to you in the menu,as shown in Figure 5.1. The options are:
1. Profile Details
2. Qualification Details
3. Publication Details
4. Patent Details
5. Project Details
6. Profile Other Details
7. View Full Profile
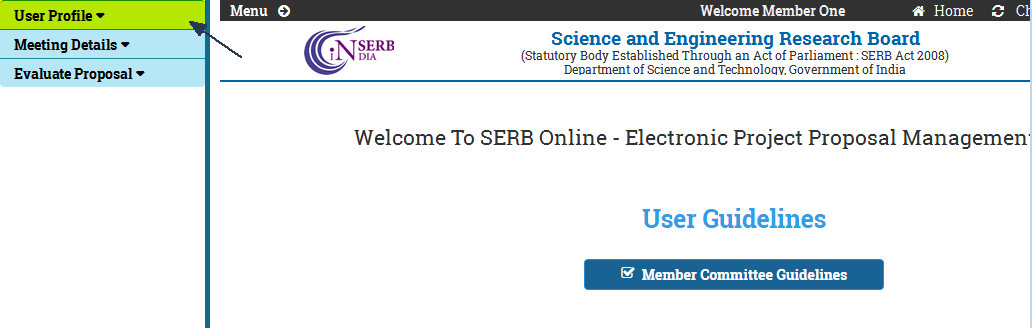
Figure 5.1
Profile Detail:
You can fill your profile by selecting the Profile Detail appearing on left pane of the page, as shown in Figure 5.2.
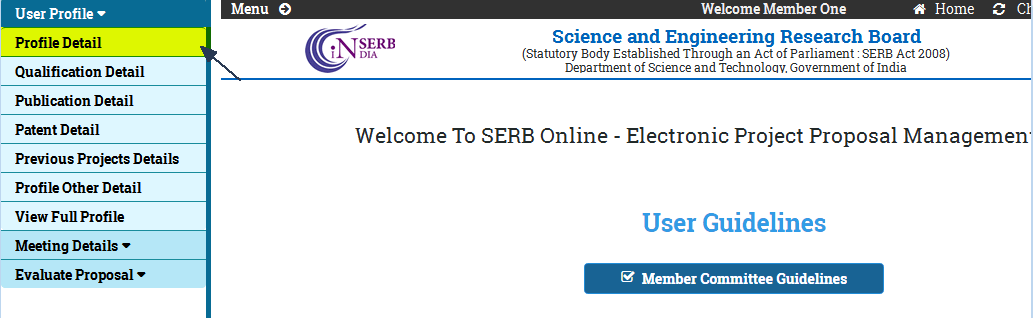
Figure 5.2
Select the option shown by arrow, as shown in Figure 5.2.
Page will appear as shown in Figure 5.3, fill all the details asked in form. The biodata and image will be uploaded by selecting the file from your system.
NOTE: In case, you are not able to find your institute in the list, select "All" in Institute Type. All institute existing in selected city will be displayed. And If then you are not able to find the institute name, select "others" in institute name and you can see the different text boxes to be filled. Fill all the text boxes as information asked to enter the Institute address details.
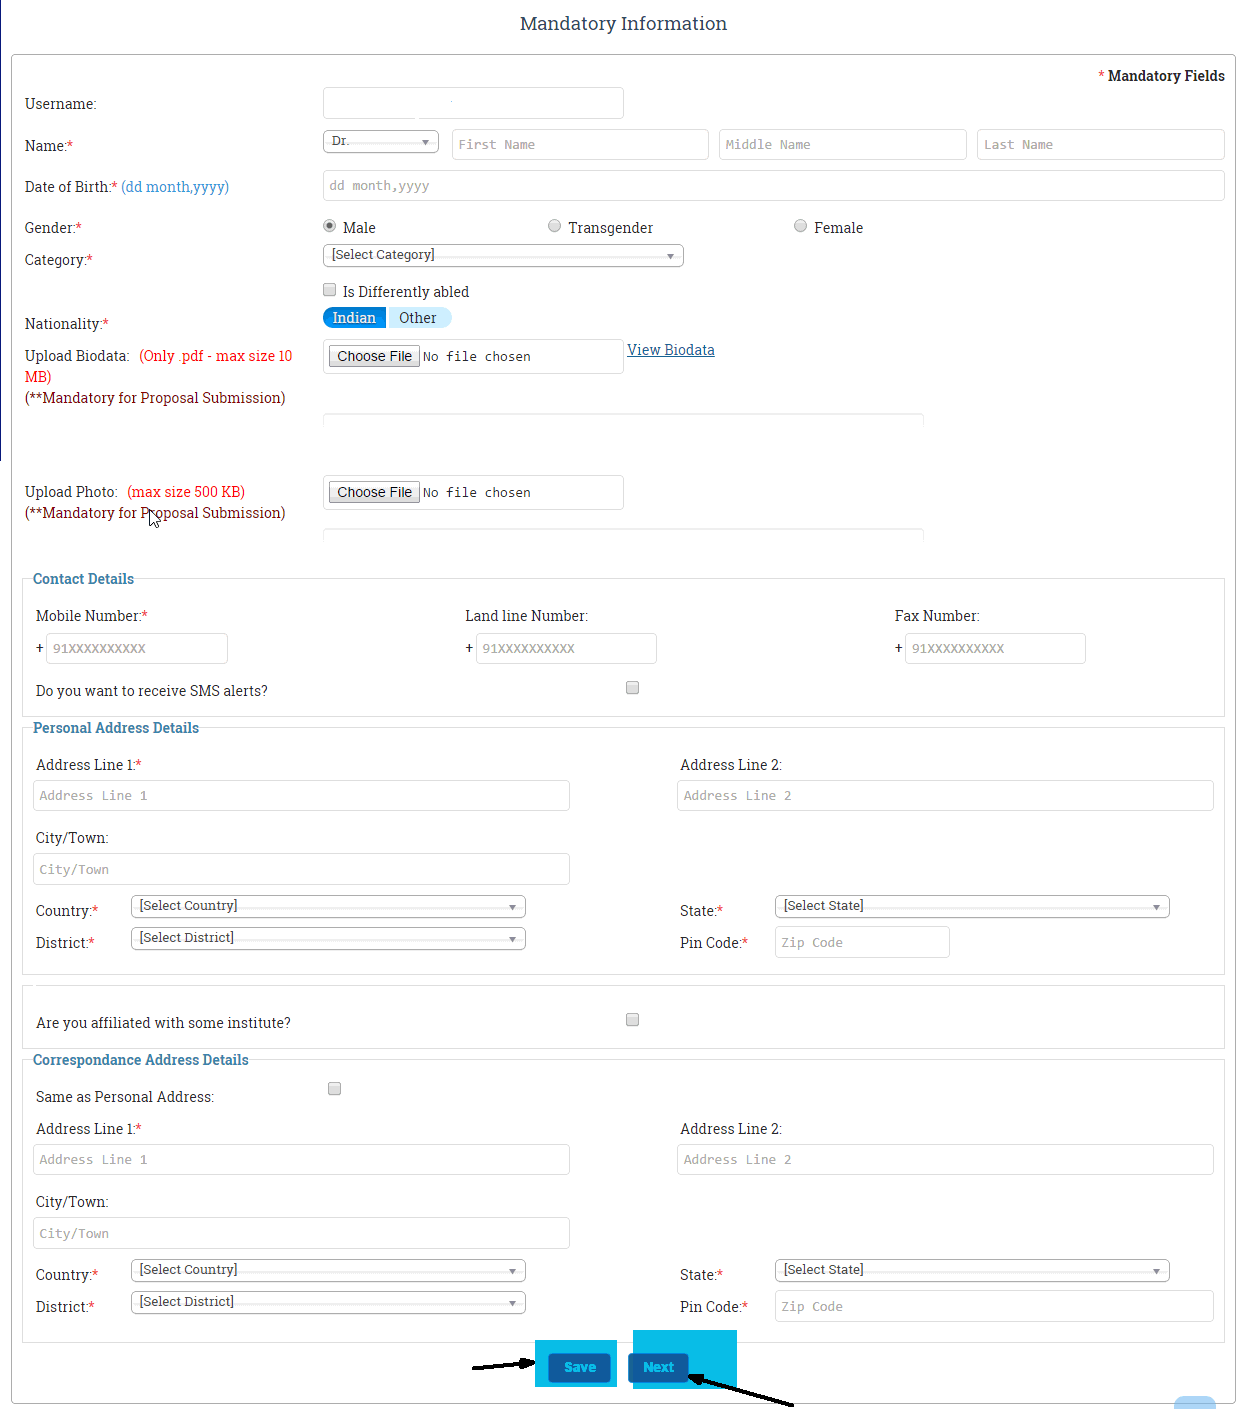
Figure 5.3
Click on the Save button when you want to submit the details filled by you. The page will appear as shown in Figure 5.4.
Click on the Next (highlighted) button to go to next page.

Figure 5.4
Qualification Details:
The "Next" button in User Profile will open this page as shown in Figure 5.5. This form is to fill the qualifications. The sequence must be from higher qualification to lower qualifications.
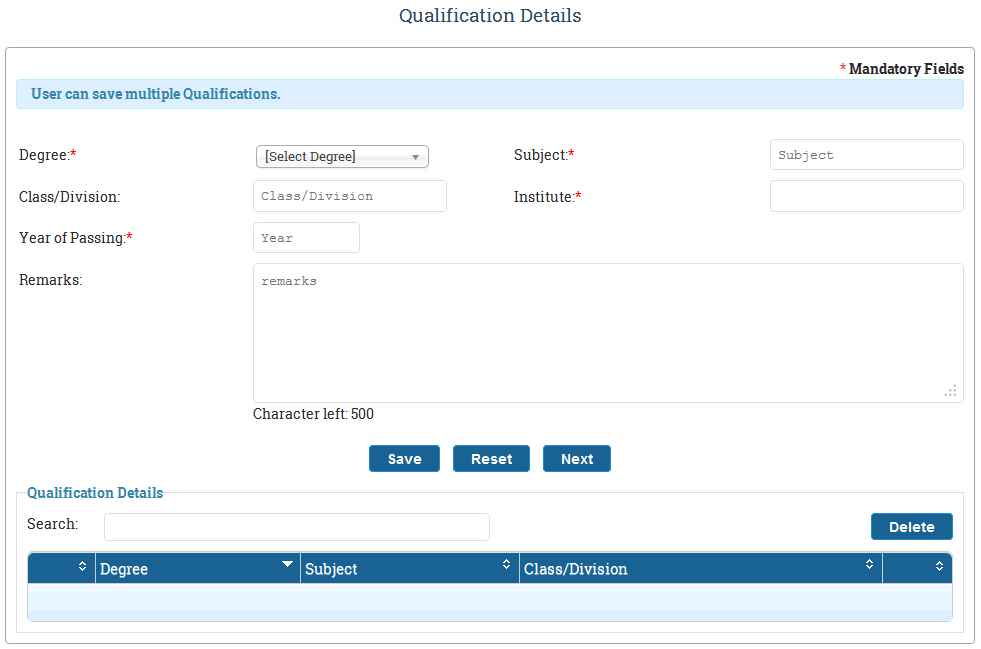
Figure 5.5
Fill the details in the form as shown in Figure 5.6 and then click on the Save button , to add the qualification to the table.
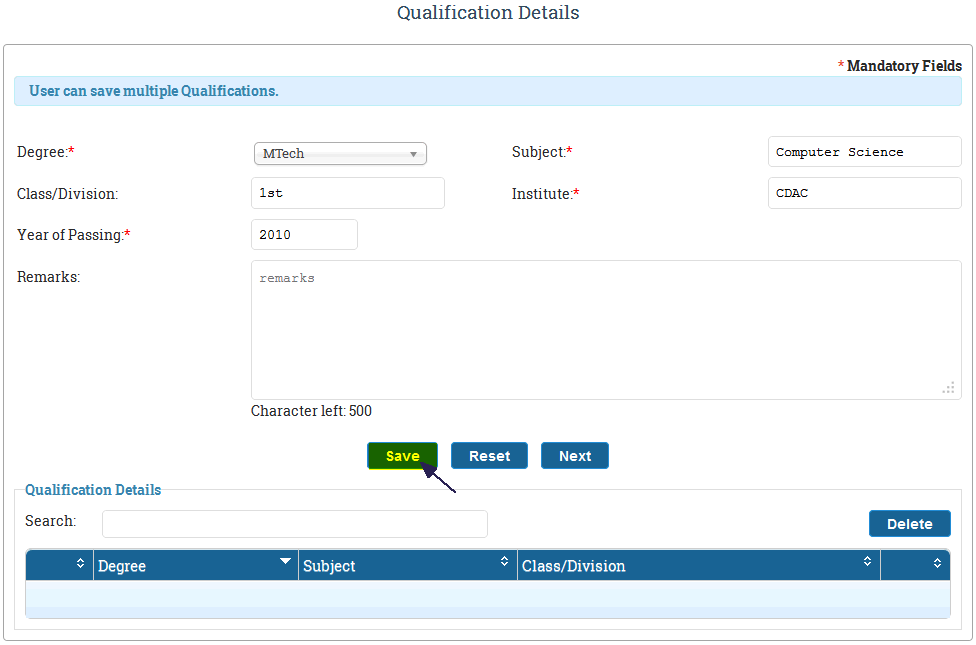
Figure 5.6
The qualifications added by you will appear as shown in the table below, Figure 5.7.
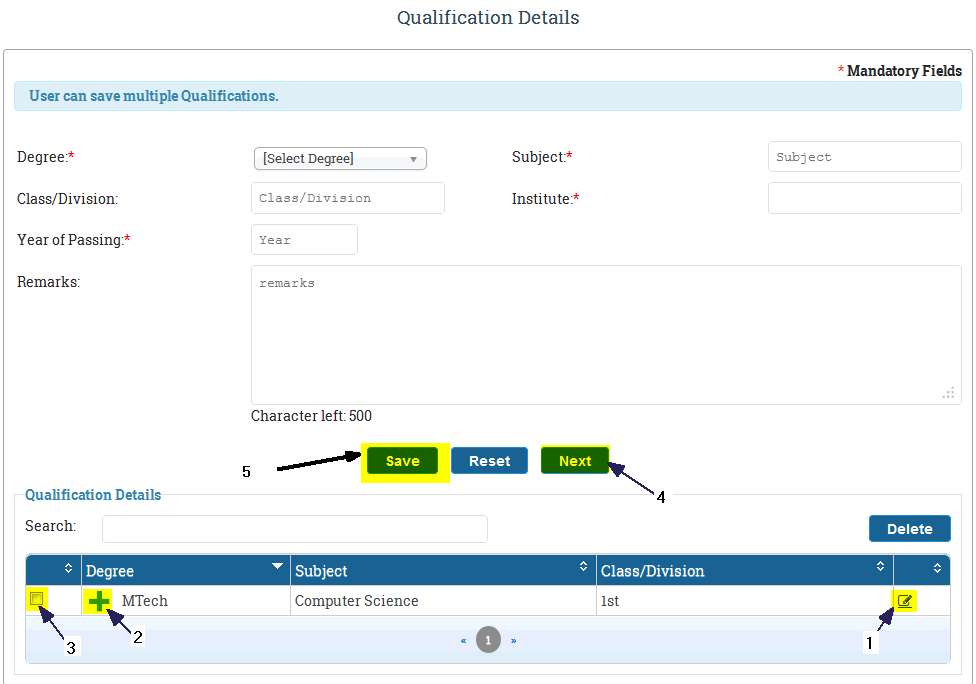
Figure 5.7
The numbered features are explained below:
1. This button is used to edit the details of the corresponding qualification. On click, the information displayed in the row will be displayed in the respective fields for editing.
2. This sign is used to display the hidden details of the fields not displayed in the table. Select it to display data and it will turn into minus(-) sign and the details will be shown.
3. The checkbox is used to delete the entry from the table. Select the checkbox and then click on Delete button on the right side, the selected qualification will be deleted from the table.
4. The Next button on click will lead you to the next page. After submitting all the details click on this to go to next page.
5. The "Save" button is used to save the data, which you have entered in the respective fields.
Publication Details:
The form will appear after selecting Next in Qualification Detail Form as shown in Figure 5.8. In this form, fill details of the paper, journals and books published by you in last five years.
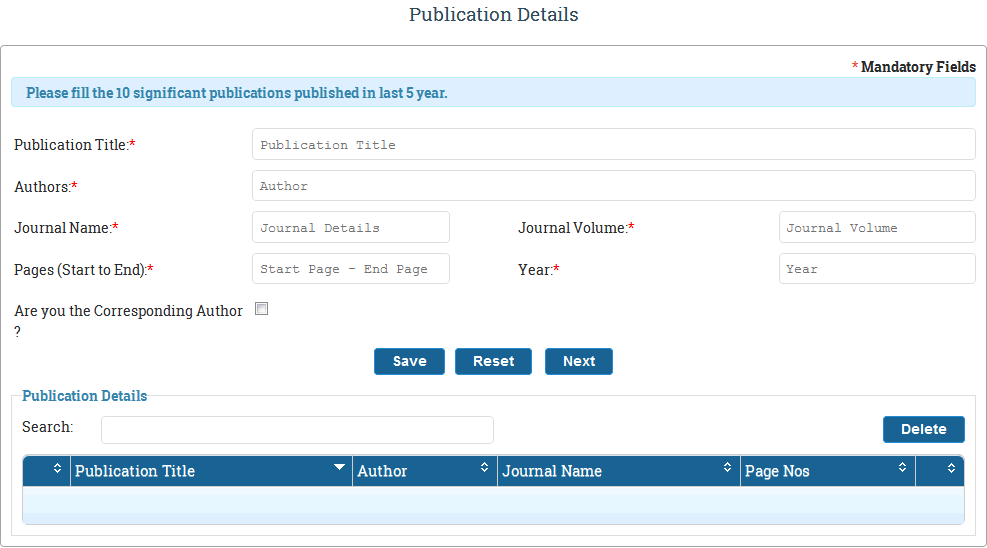
Figure 5.8
Fill in the details of your work as shown in Figure 5.9 and then click on save button (highlighted) to submit.
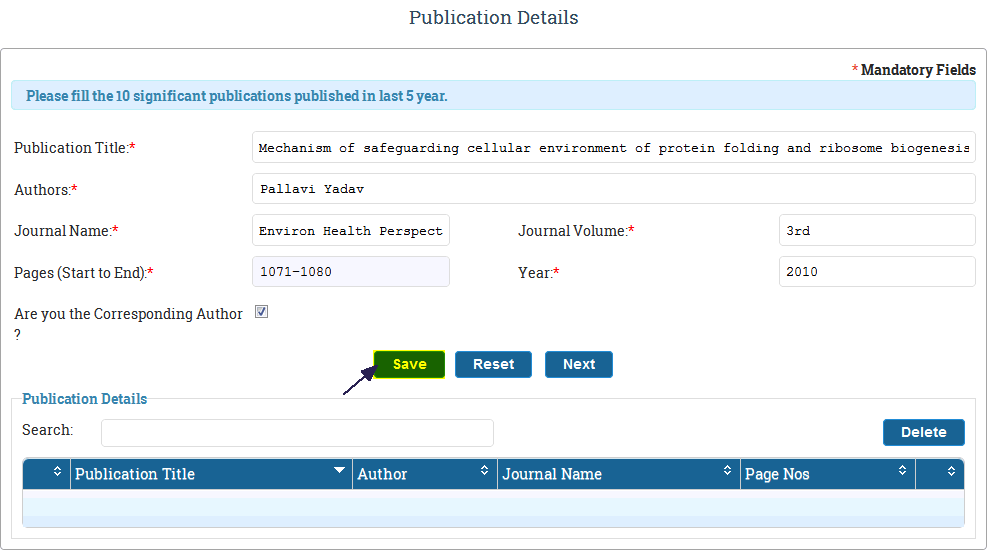
Figure 5.9
The details filled by you will appear in the table, as shown in Figure 5.10. Fill all the details of Publications and click on Save button to submit it.
Edit and Delete information, if required as explained above.
Click on Next button (highlighted) to go next page.
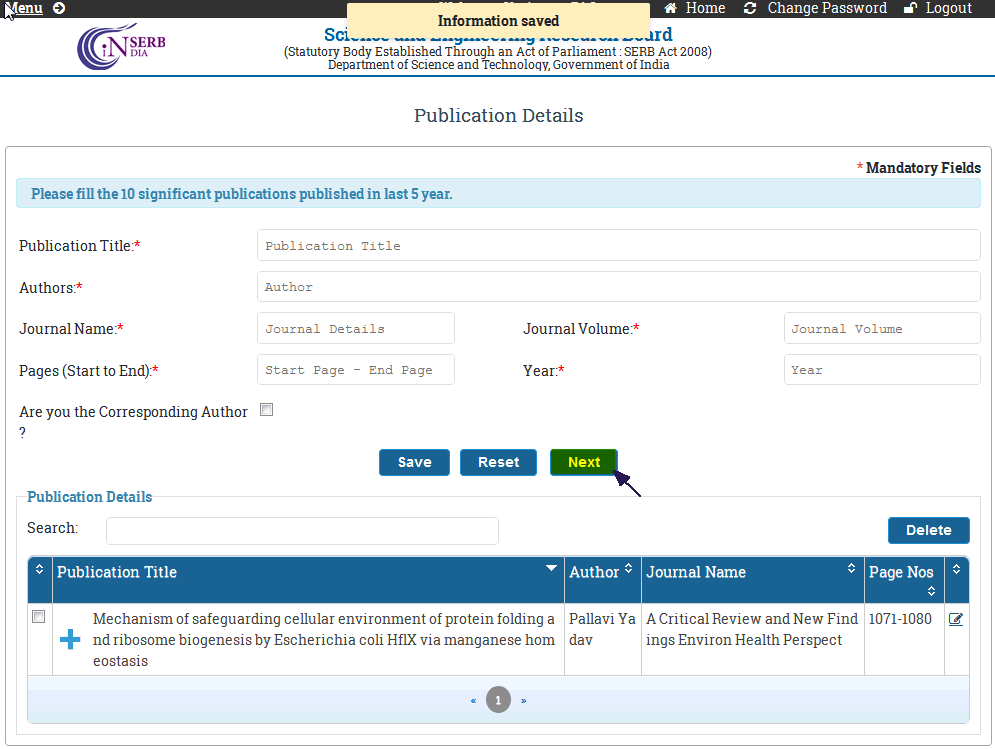
Figure 5.10
Patent Detail:
The page will appear on click of Next Button of "Publication Details", as shown in Figure 5.11. Provide all the details if you have ever filed for patent,whether approved or is under process.
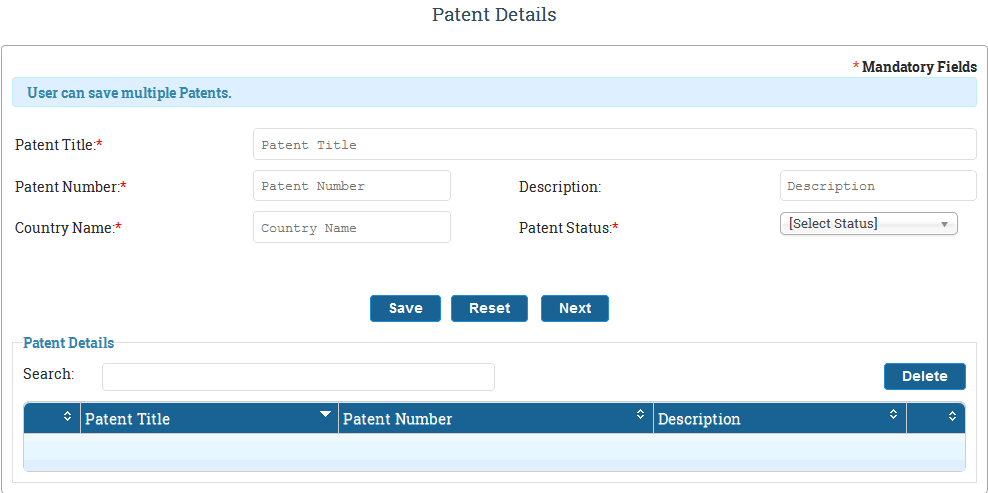
Figure 5.11
Fill the details of patent in the form and click on "Save" button (highlighted) to add it to list of patents added, as shown in Figure 5.12.
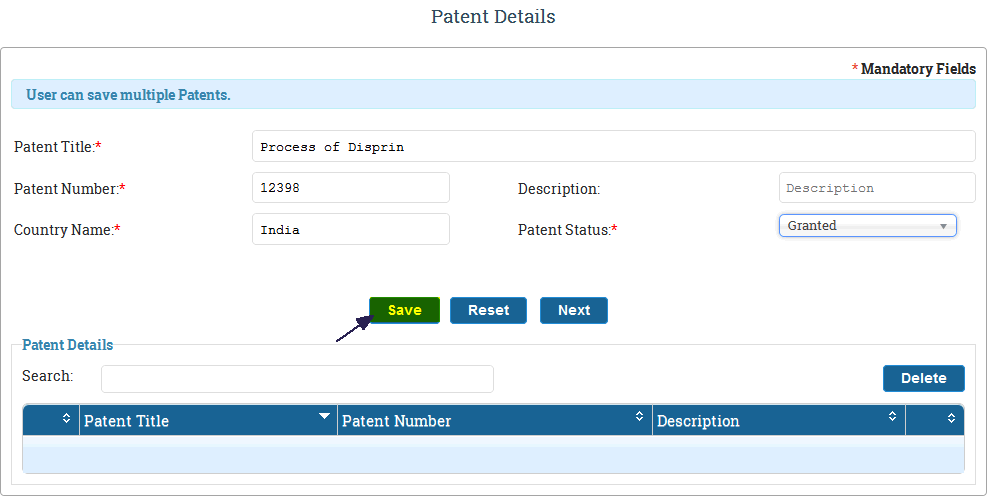
Figure 5.12
The Patent details added will appear in the table, as shown in Figure5.13. You can add new details, edit or delete the details which are already added. Click on Next button (highlighted) to go to next page.
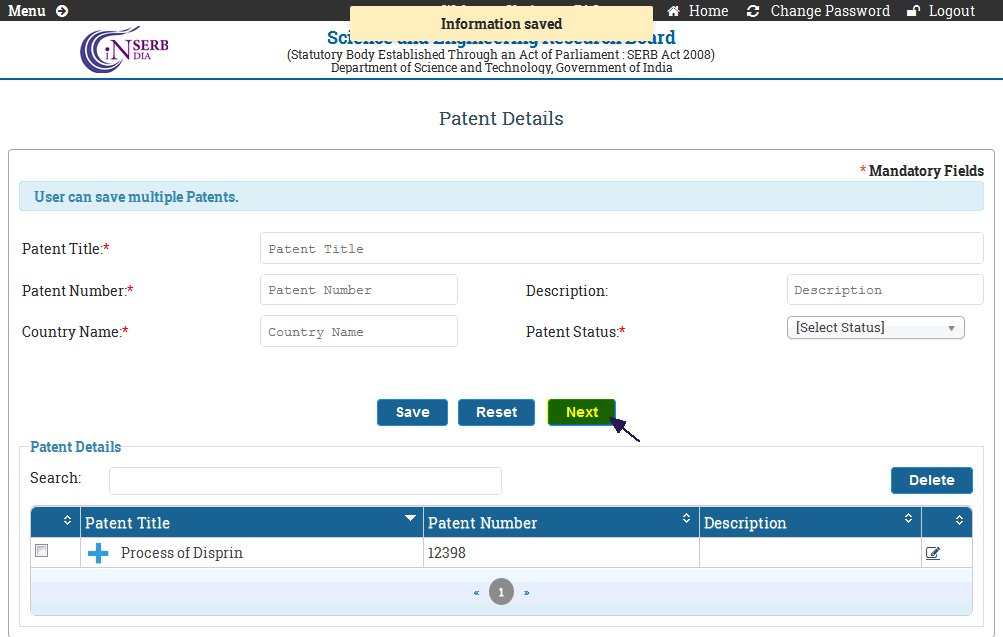
Figure 5.13
Project Details:
This Page will appear next to "Patent Details" form, as shown in Figure 5.14. You have to provide the details of the projects, earlier done by you and of those which are still going on.
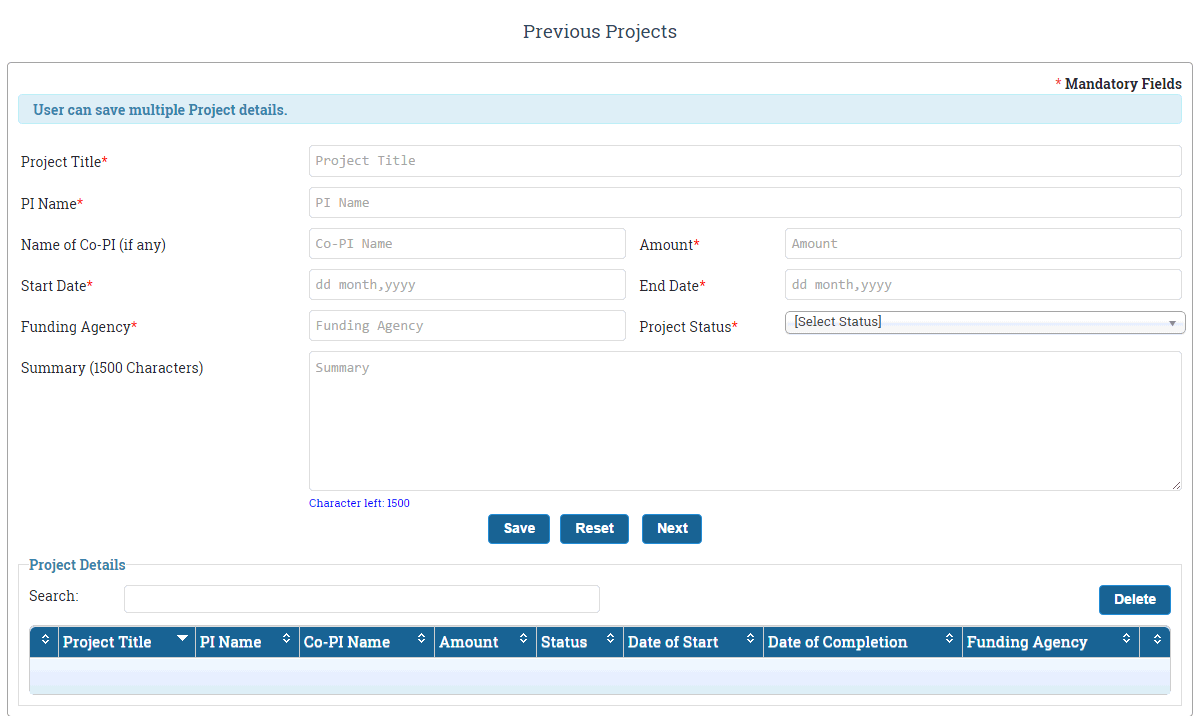
Figure 5.14
Fill the details in the form as shown in Figure 5.15. Click on the Add button to add the details, which will appear in the table.
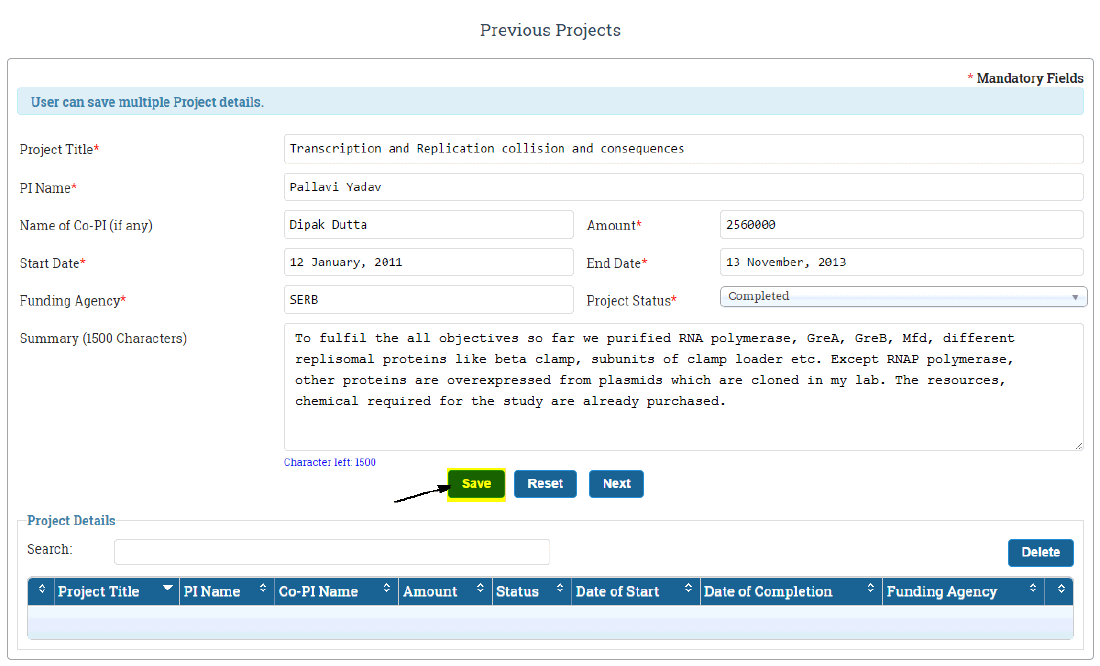
Figure 5.15
The details will appear in the table, as shown in Figure 5.16, which can be edited and deleted if required as explained before. More than one project details can be added. Provide new details in the fields and then click on Save button. Click on the Next button when all the details are submitted.
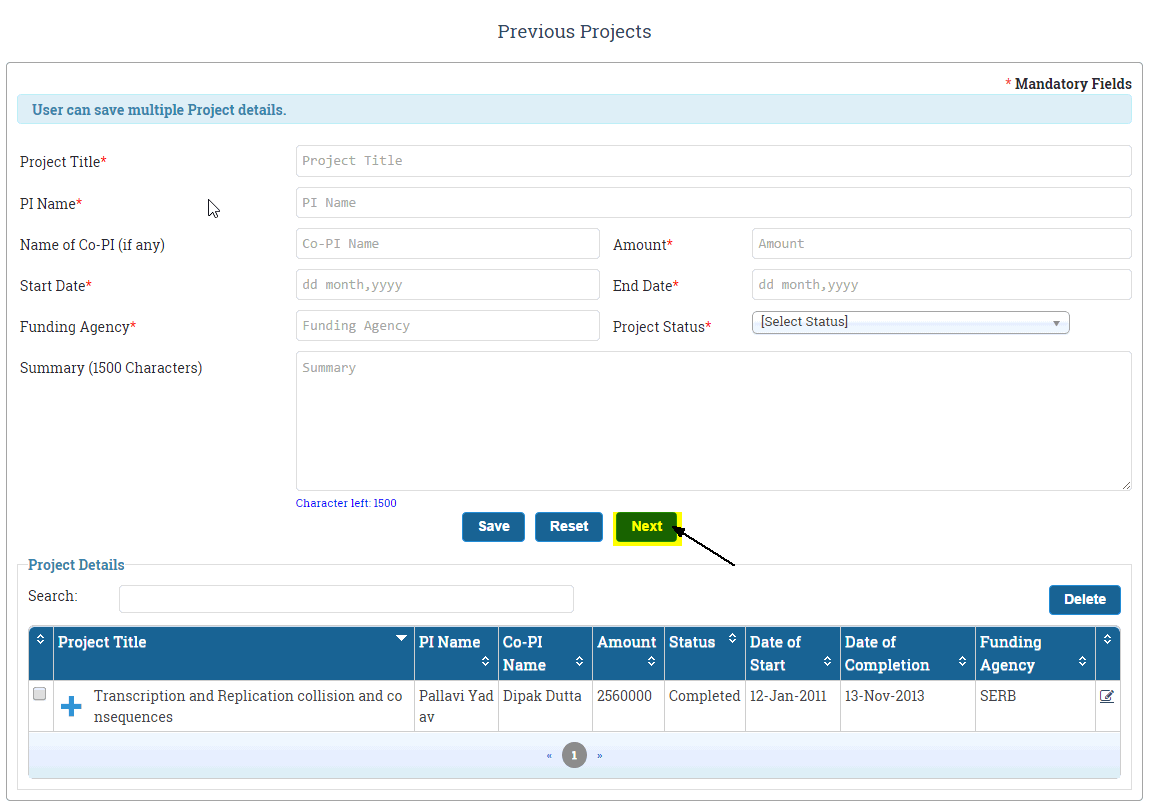
Figure 5.16
Profile Other Details:
In this form you have to provide different achievements, it is an optional field. The form will appear as shown in Figure 5.17.
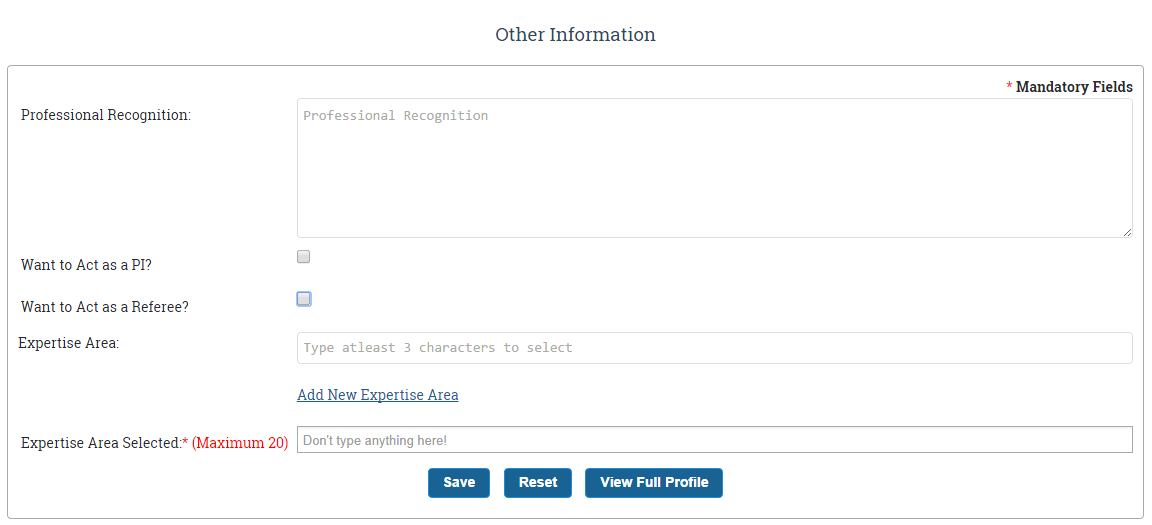
Figure 5.17
Fill the details of your achievement in the field Professional recognition. In case you want to act as PI ,click on the checkbox beside "Want to Act as a PI?" and fill the expertise area in which you want to act as PI or in case you want to act as Referee click on the checkbox beside "Want To Act as a Referee?" and fill the expertise area,as shown in Figure 5.18.If user want to act as both PI and Referee,select both the checkboxes.
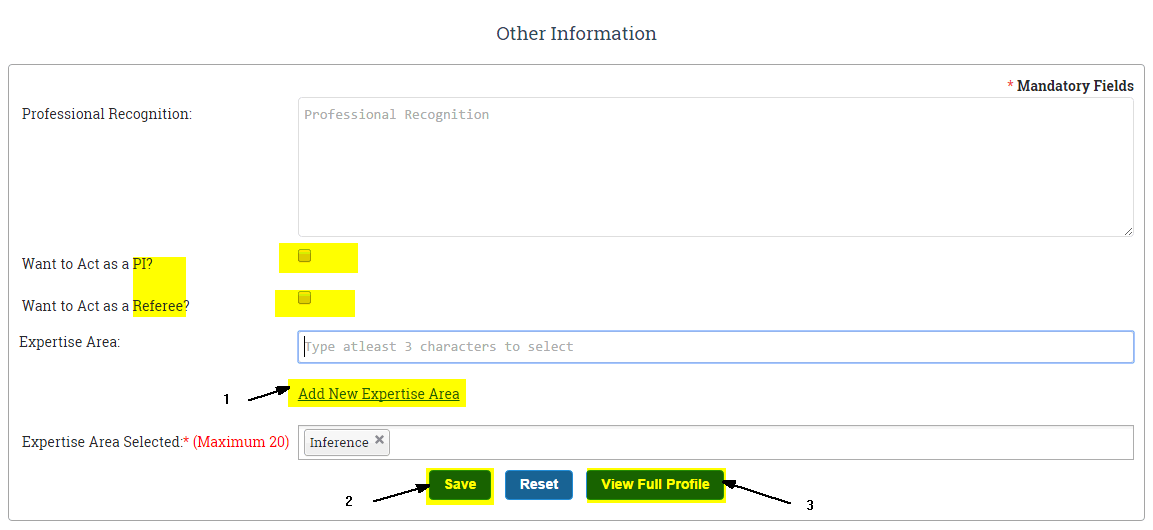
Figure 5.18
The numbered entities are:
1. Add New Expertise Area: Click on this if you want to add a new Expertise Area which is not available in the database .Enter the Expertise Area and then click on Add button.
2. Save: Click on this if you have filled the details.
3. View Full Profile: Click on this if you want to go directly to full profile.
Figure 5.19 will appear when you have selected Save button. You can directly view full profile by selecting View Full Profile, i.e. not opting to give your "Professional Recognition".
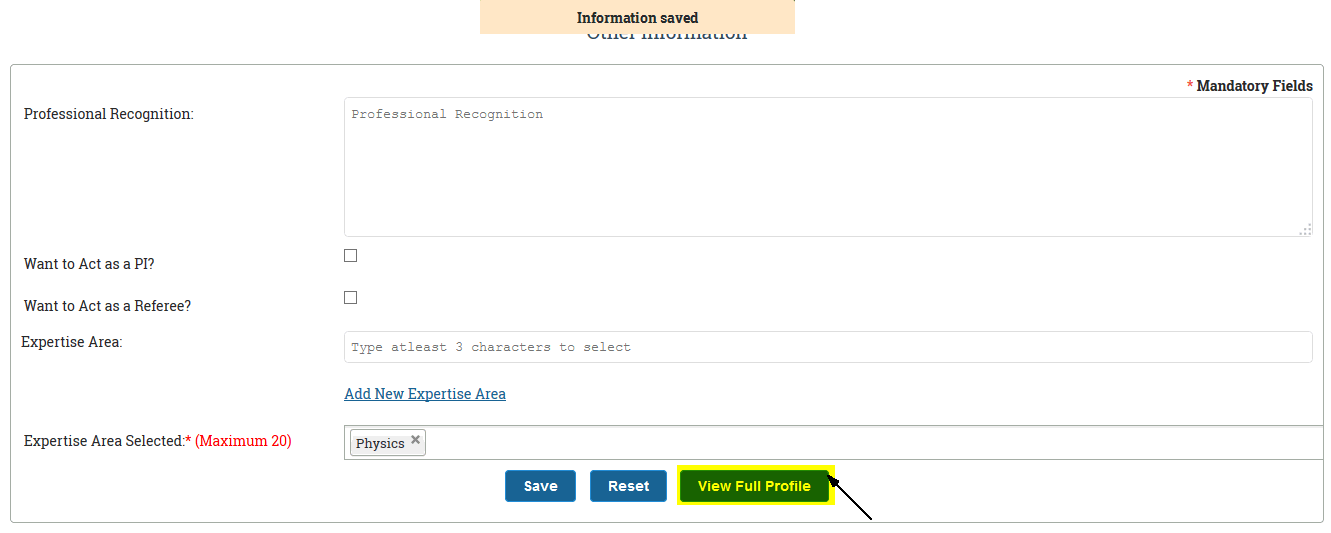
Figure 5.19
View Full Profile:
The full profile will appear as shown inFigure 5.20. If you want to have hard copy of profile, click on the Print" button at the bottom of the page.
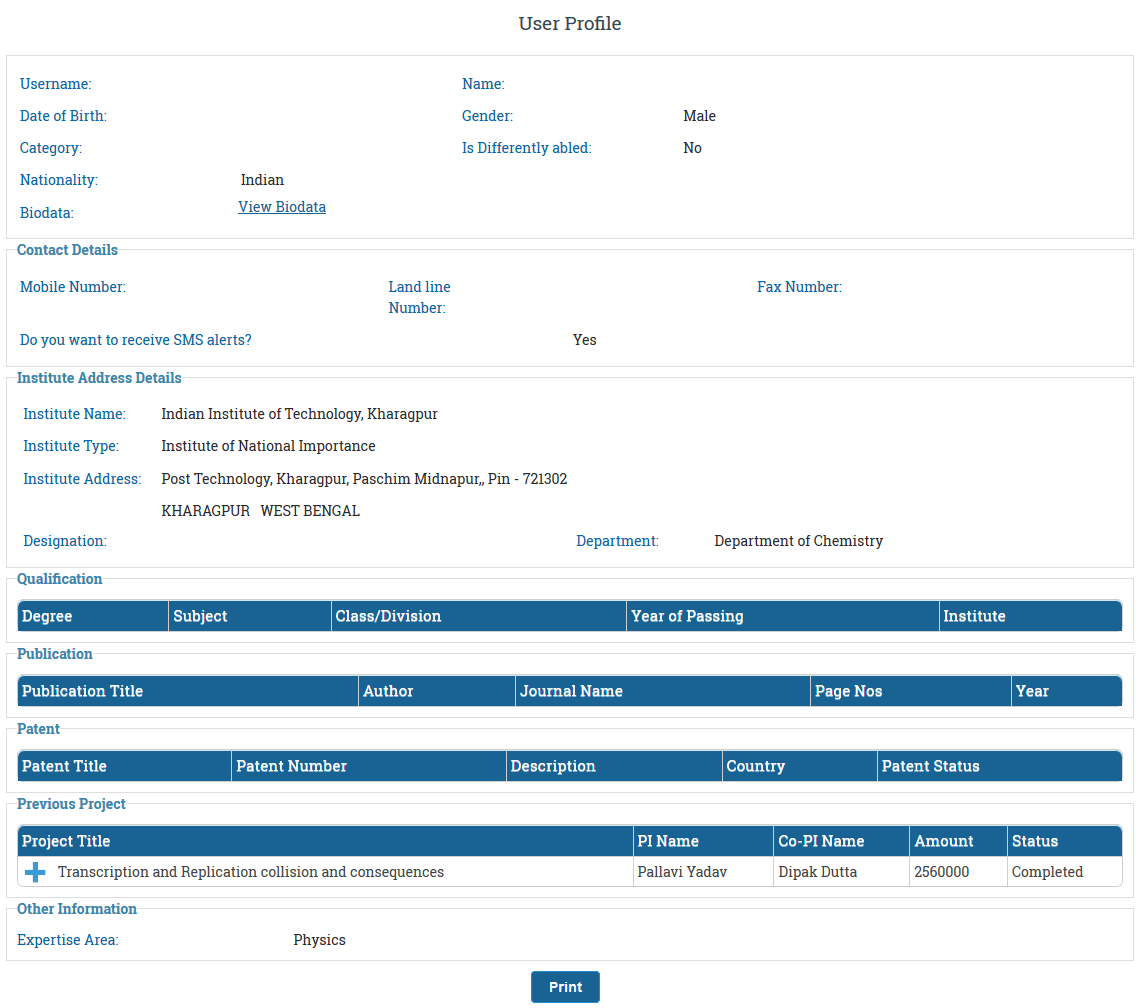
Figure 5.20