Monitoring
Click on the option named Monitoring, as shown in Figure 5.1, to see the submenu. The sub option included are:
-
Request Sent
-
Submit Document
-
Extension with Fund
-
Extension without Fund
-
Additional Grant
-
Closure
-
Miscellaneous Request
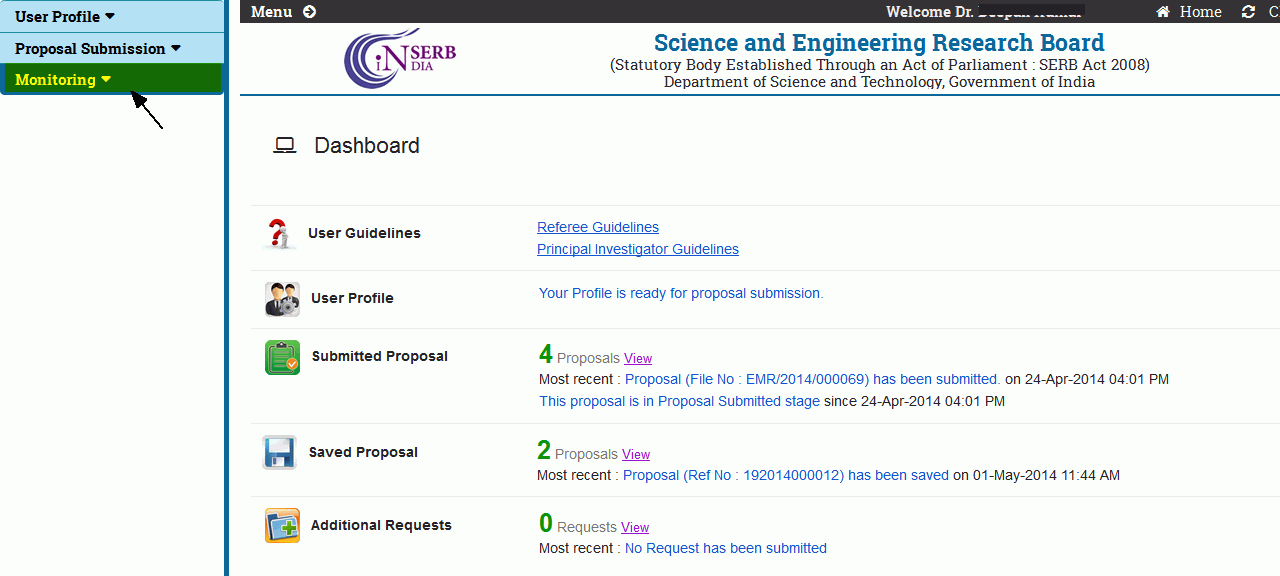
Figure 5.1
Request Sent:
This option is used to keep track of the requests sent to the concerned authority related to the project. Click on the highlighted area Request Sent under Monitoring menu ,as shown in Figure 5.2.
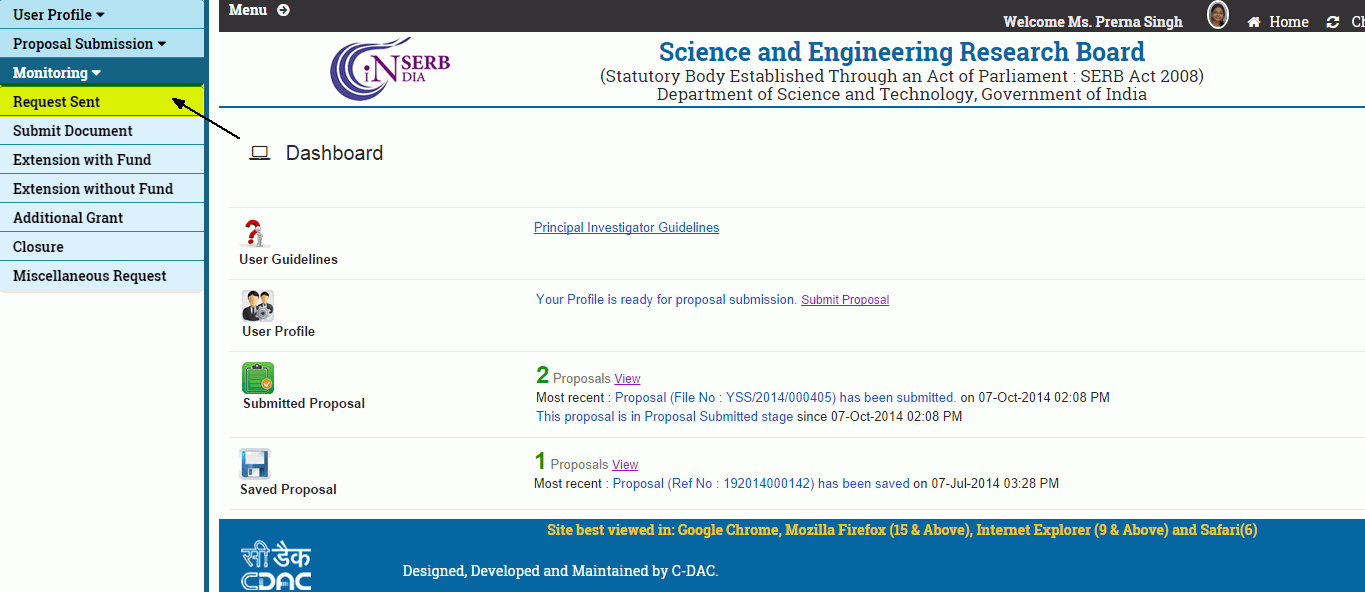
Figure 5.2
The page will open, as shown in Figure 5.3. You can see the proposal and the request sent ,by selecting the different hyperlink.
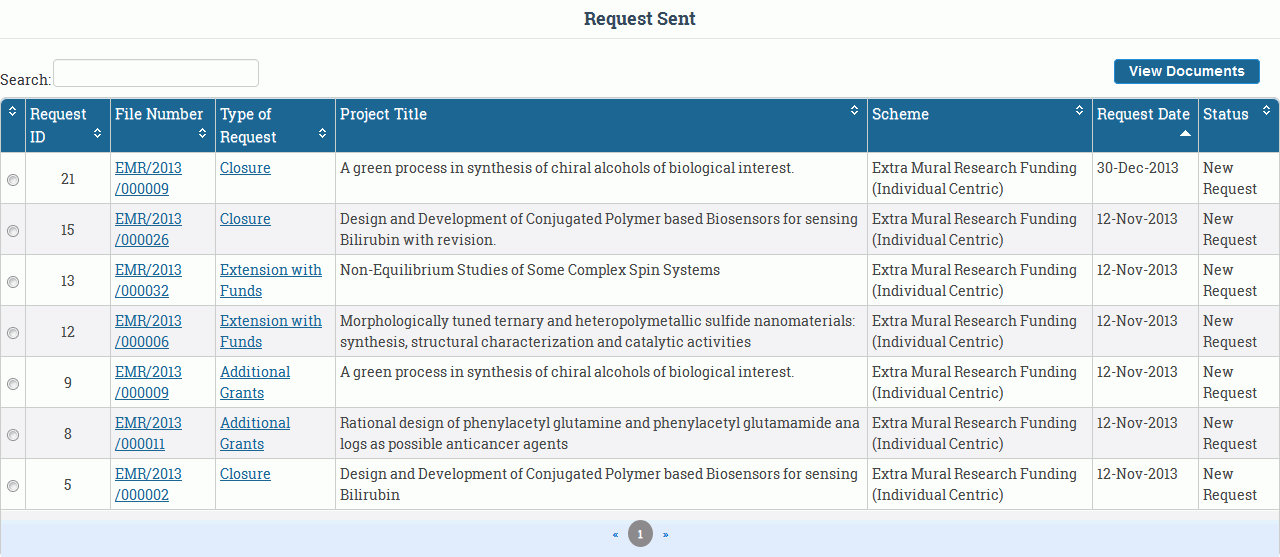
Figure 5.3
Submit Document :
This option is to submit the documents required ,other than already submitted during proposal submission phase. On selecting the option named Submit Document the page will appear as shown in Figure 5.4.
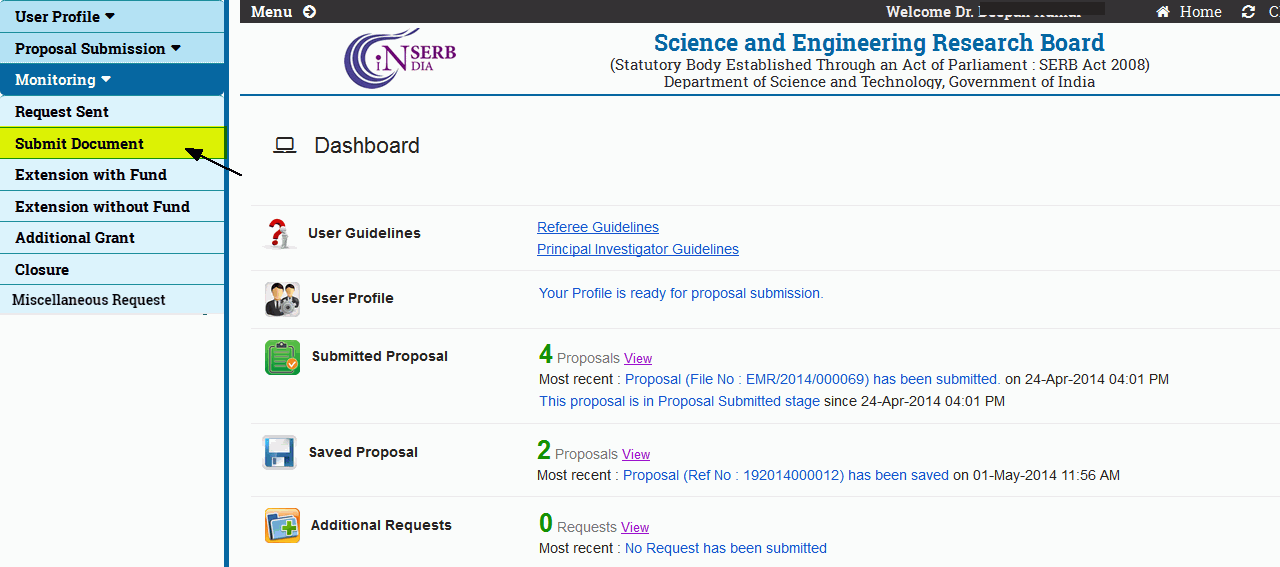
Figure 5.4
After selecting Submit Document, the Upload Document form will open as shown in Figure 5.5.
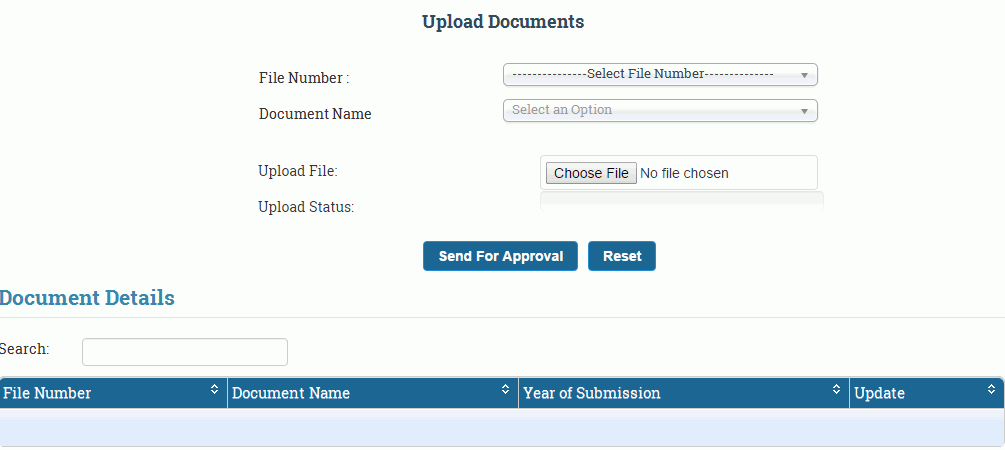
Figure 5.5
Fill in the details in the form as shown in Figure 5.6 and click on the Send For Approval button (highlighted).
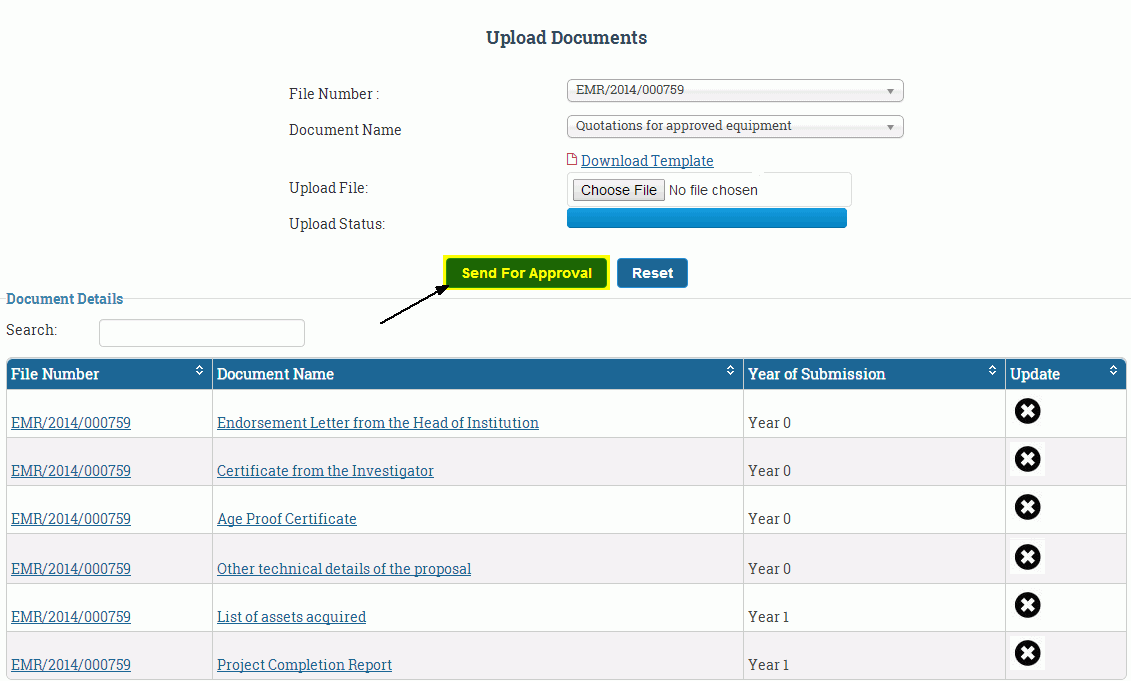
Figure 5.6
After saving the data, the page will appear as shown in Figure 5.7.
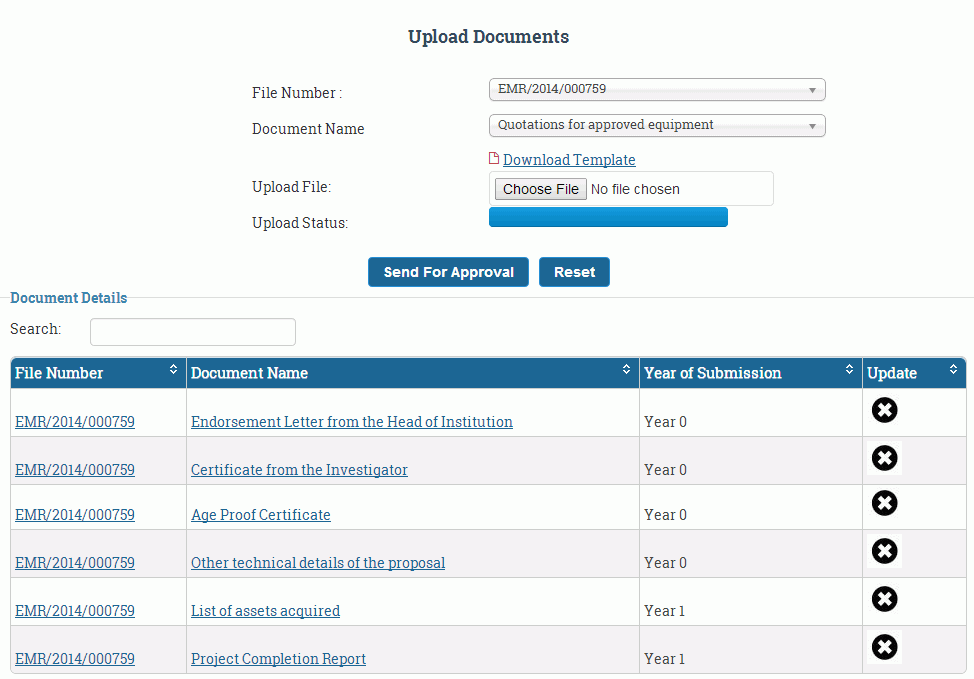
Figure 5.7
Extension with Fund :
This is used to send the request regarding extension of time duration and the total budget of the project. Click an option named Extension with Fund appearing on left pane of the menu, as shown in Figure 5.8.
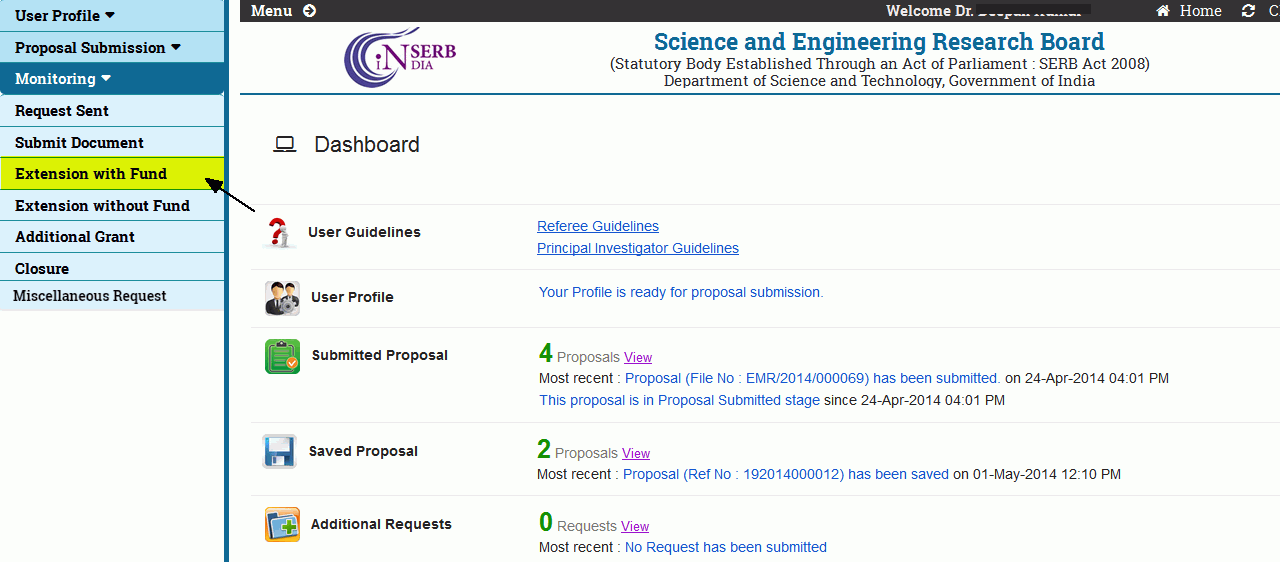
Figure 5.8
The Extension with Fund form will appear as shown in Figure 5.9.
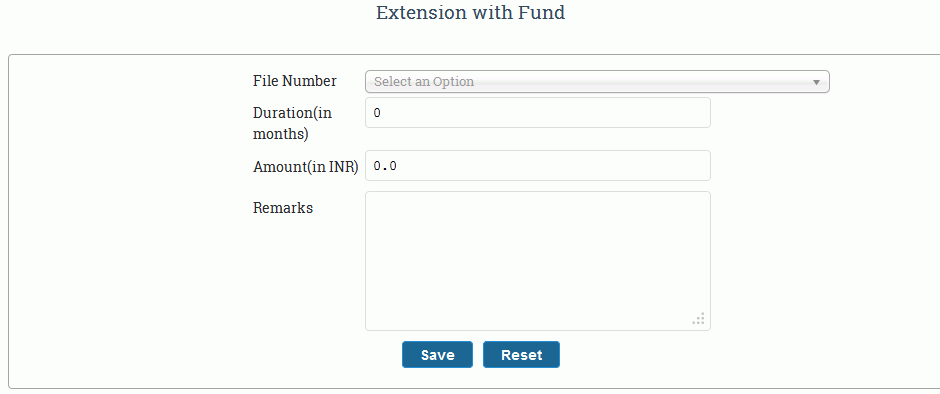
Figure 5.9
Fill in the details in the form and click on the Save button, as shown in Figure 5.10.
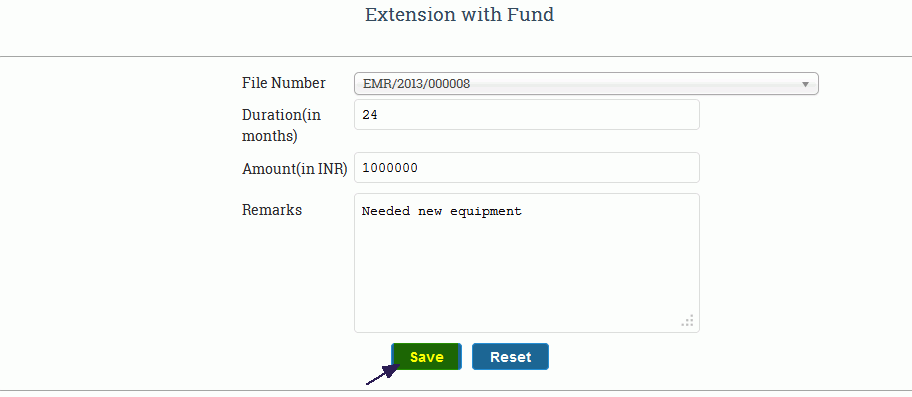
Figure 5.10
After submitting the request, the alert message will be displayed, as shown in Figure 5.11.
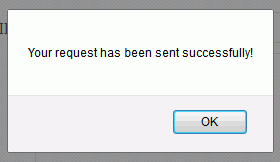
Figure 5.11
Extension without Funds :
This facilitates you to request for the extension of time duration of project. Select option named Extension without Fund appearing in submenu, as shown in Figure 5.12.
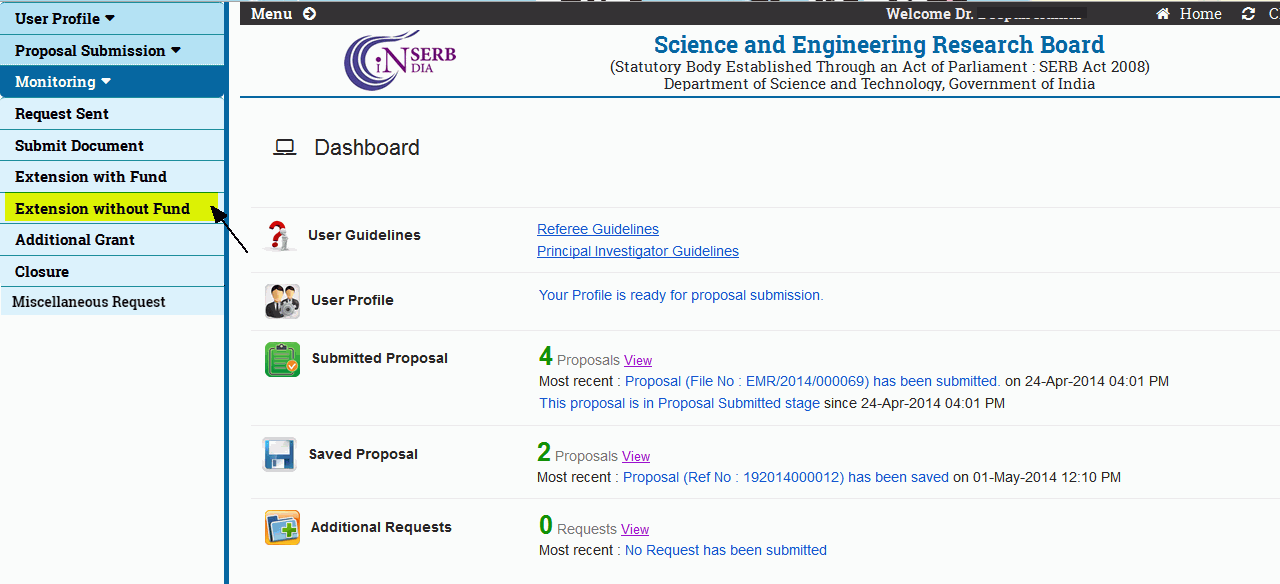
Figure 5.12
The form will appear as shown in Figure 5.13.

Figure 5.13
Fill in the details in the form and click on Save button, as shown in Figure 5.14.

Figure 5.14
After submitting the request ,an alert message will be displayed as shown in Figure 5.15.

Figure 5.15
Additional Grant :
This provides the facility to request for additional grant required for the project. Click on option named Additional Grant, as shown in Figure 5.16.
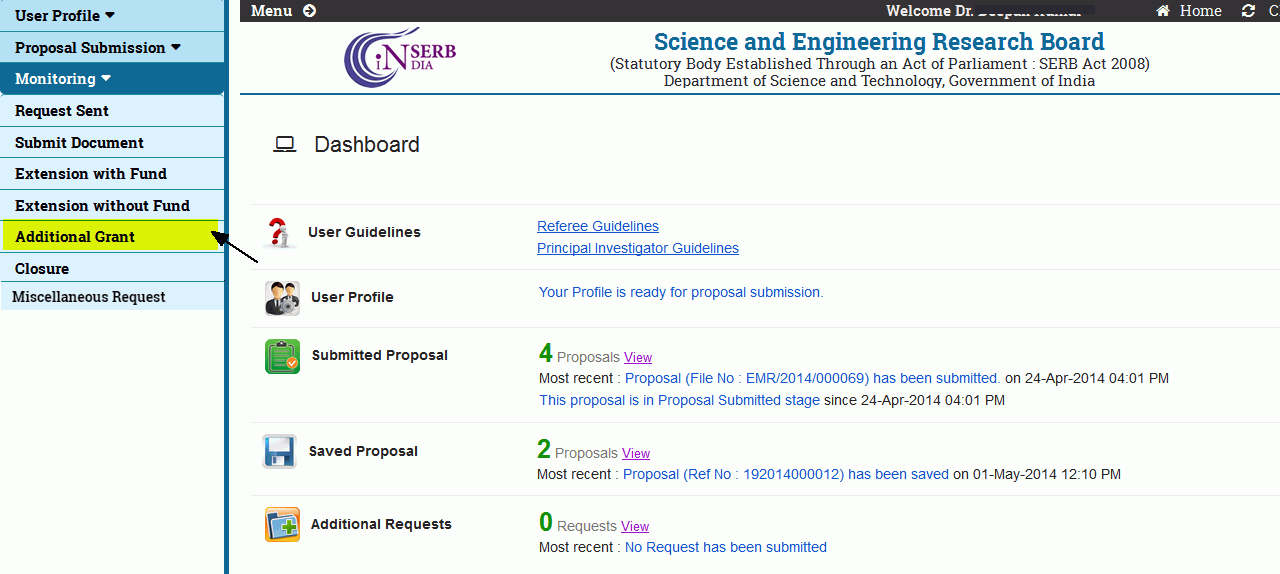
Figure 5.16
The Additional Grant form will appear as shown in Figure 5.17.

Figure 5.17
Fill in the details in the form and click on the Save button, as shown in Figure 5.18.

Figure 5.18
After submitting the request, an alert message will be displayed as shown in Figure 5.19.

Figure 5.19
Closure :
This facilitates to request for the closure of project. Click on the submenu named Closure, as shown in Figure 5.20.
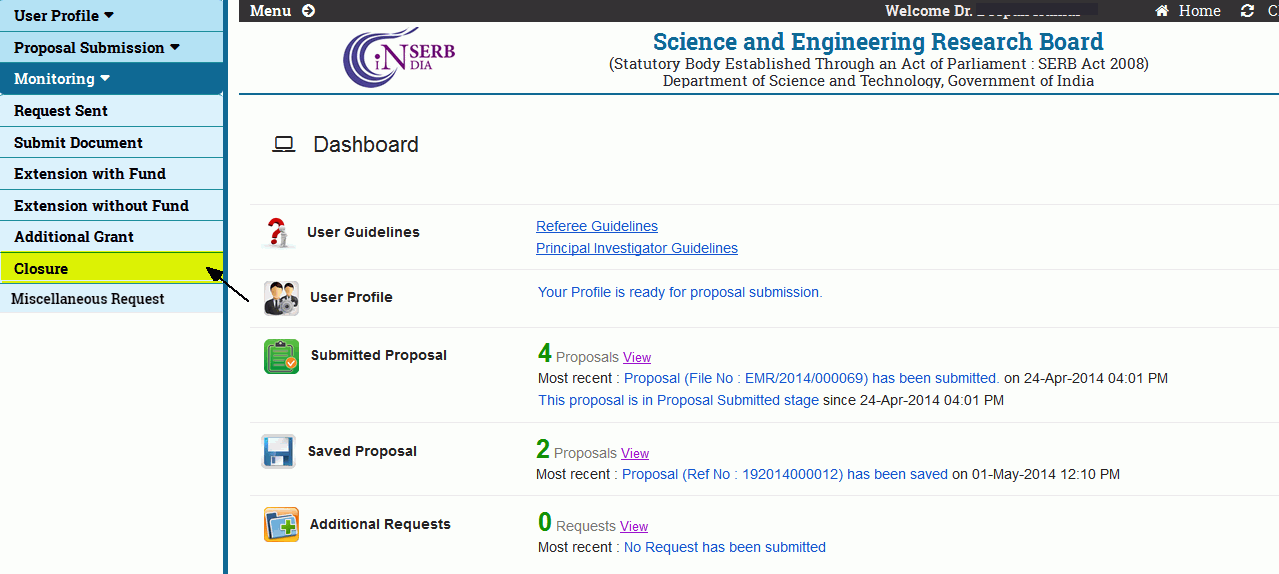
Figure 5.20
The Closure form will appear as shown in Figure 5.21.
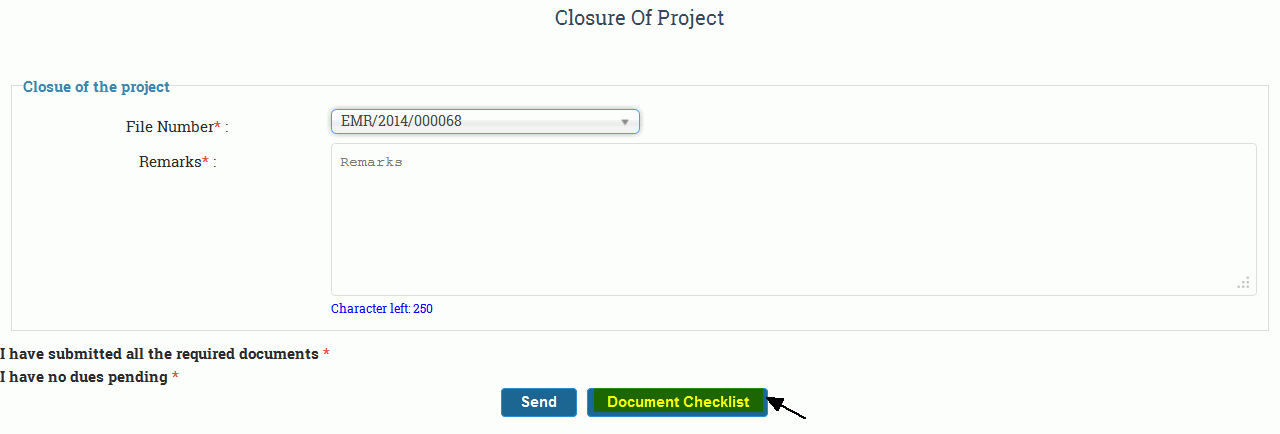
Figure 5.21
Click on Document Checklist button to view the documents submitted by you for the project, as shown in Figure 5.21.
A popup window will appear which contains the list of documents submitted by you, as shown in Figure 5.22.
You can see the details of the document by selecting the name of document. Click on Close button to close the popup window.
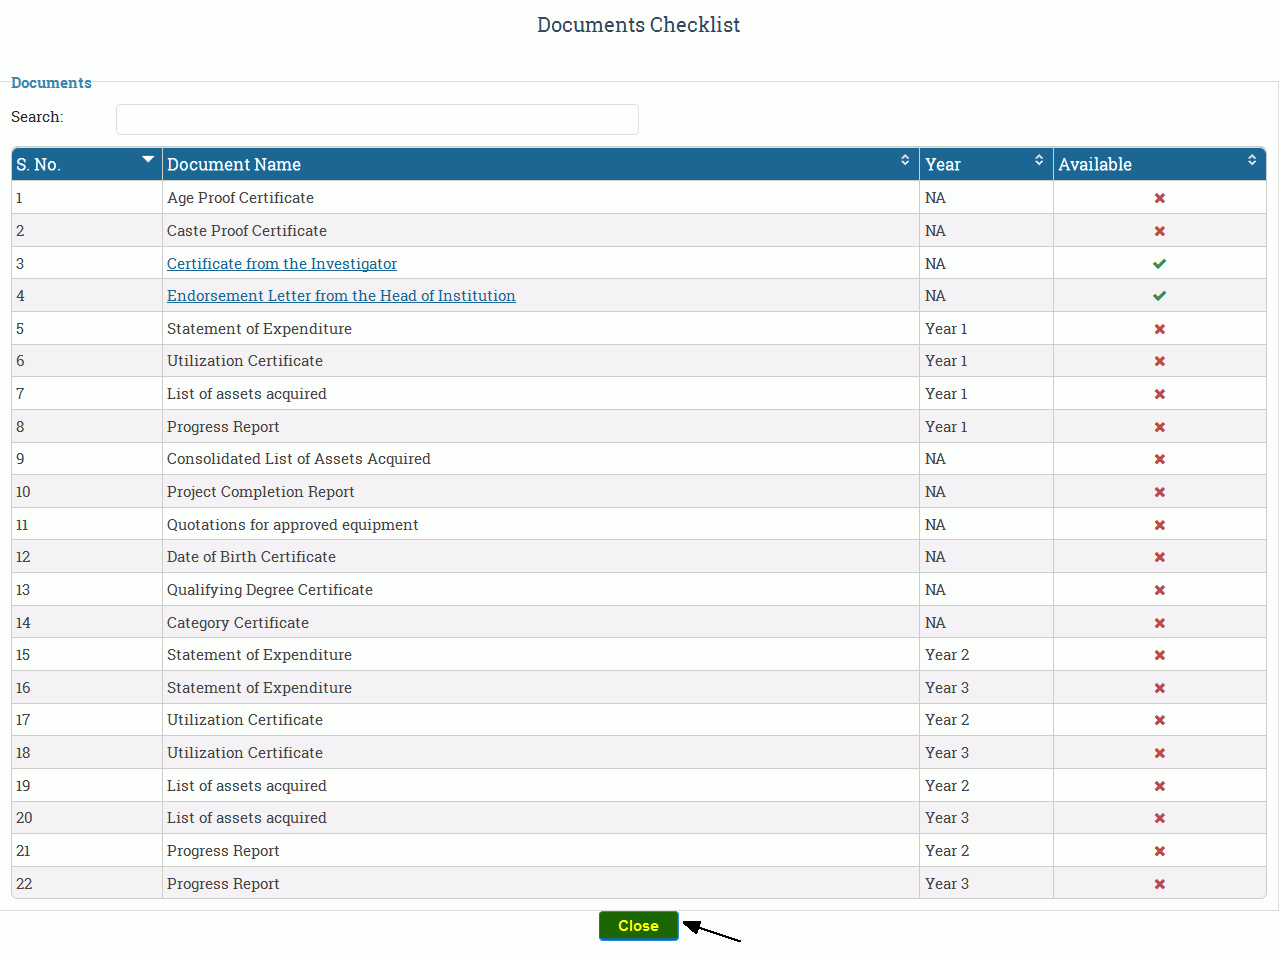
Figure 5.23
Fill in the required details in the form and click on the Send button, as shown in Figure 5.24.
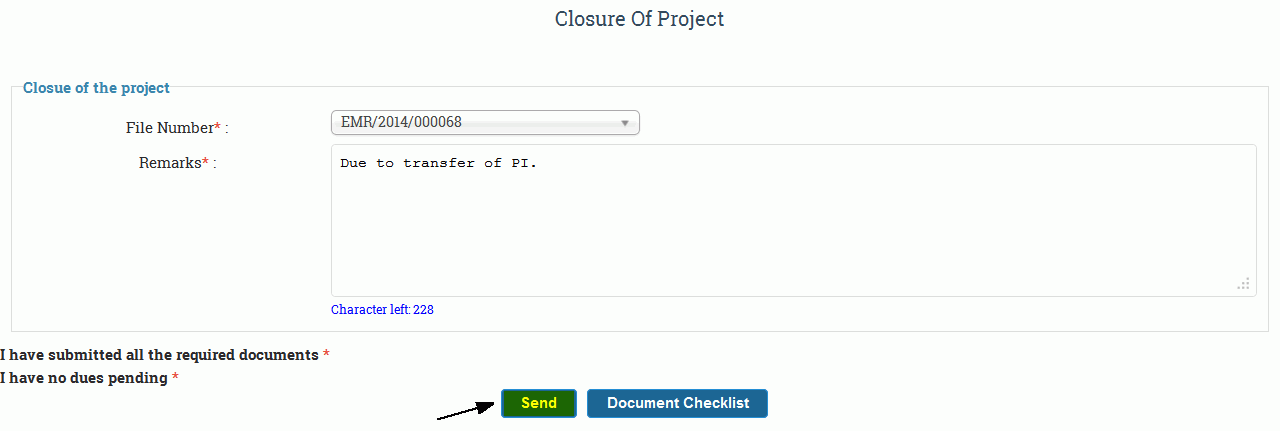
Figure 5.24
An alert message will be displayed after submitting the request, as shown in Figure 5.25.

Figure 5.25
Miscellaneous Request
If you want to add any additional request other than discussed above ,click on Miscellaneous Request from Menu as shown in Figure 5.26.
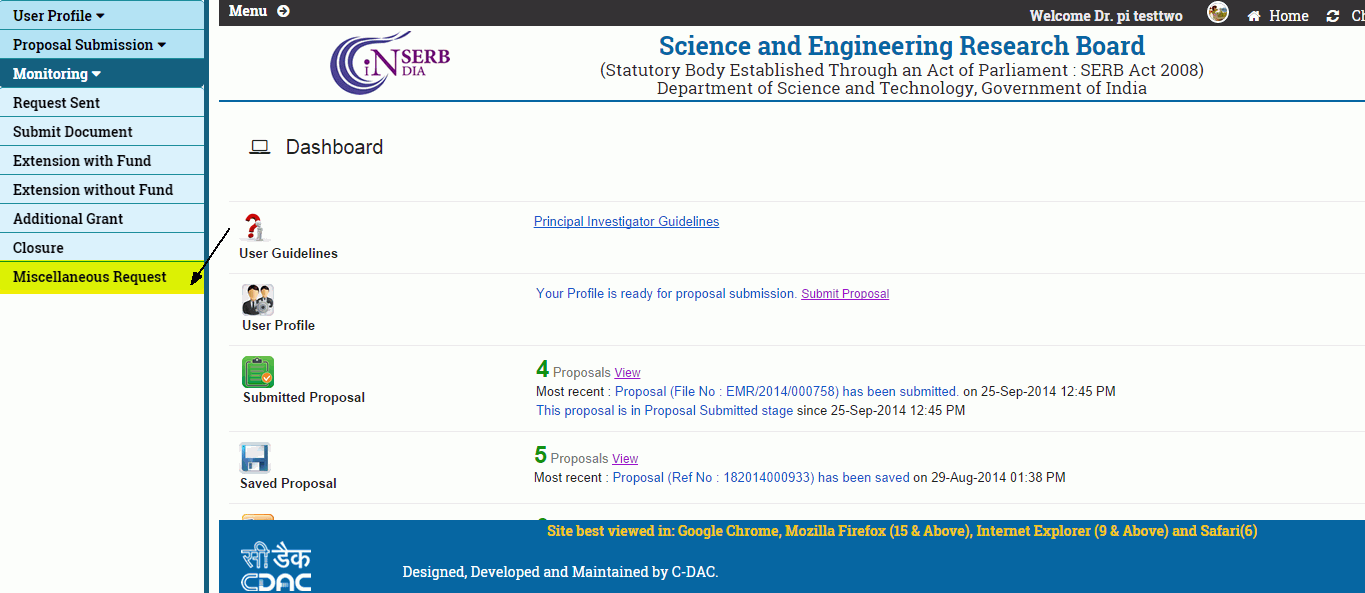
Figure 5.26
Here you can select the File number of the proposal you have already submitted,and then you can send any additional request by clicking on Send button as shown in Figure 5.27.

Figure 5.27
You can also attach any additional document you think is important for the proposal by clicking on Attach files, which will open the window as shown in Figure 5.28.
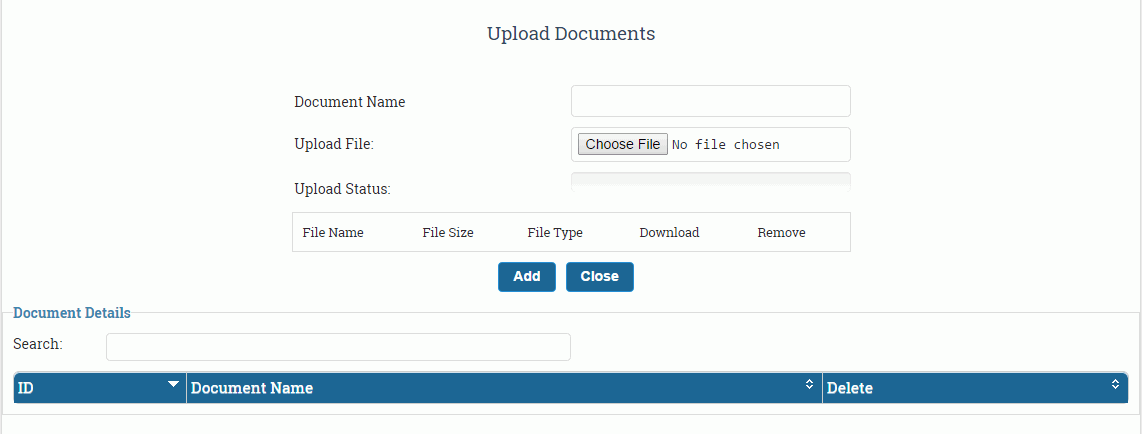
Figure 5.28

