

|
How to Submit SE/UC
Please note that:-
- SE/UC can be submitted for the project which has been started and in the Ongoing stage.
- You should have the SE/UC in prescribed format of SERB in the form of PDF.
-
You can download the format of SE and UC from www.serbonline.in under 'Download' Section (as shown in the Figure 7.0)
Action 1: Click on 'Download'
Action 2: Click on 'Utilization Certificate Template'
Action 3: Click on 'Recurring' and 'Non-Recurring' button to download their corresponding template.
Action 4: Click on 'Statement of Expenditure' to download SE template.

Figure 7.0
Step 1:
After login into the system , Go to Menu->Proposal Submission-> View Submitted Proposal, as shown in Figure 7.1. This will give you the list of all proposals submitted by you in SERB as shown in Figure 7.2..
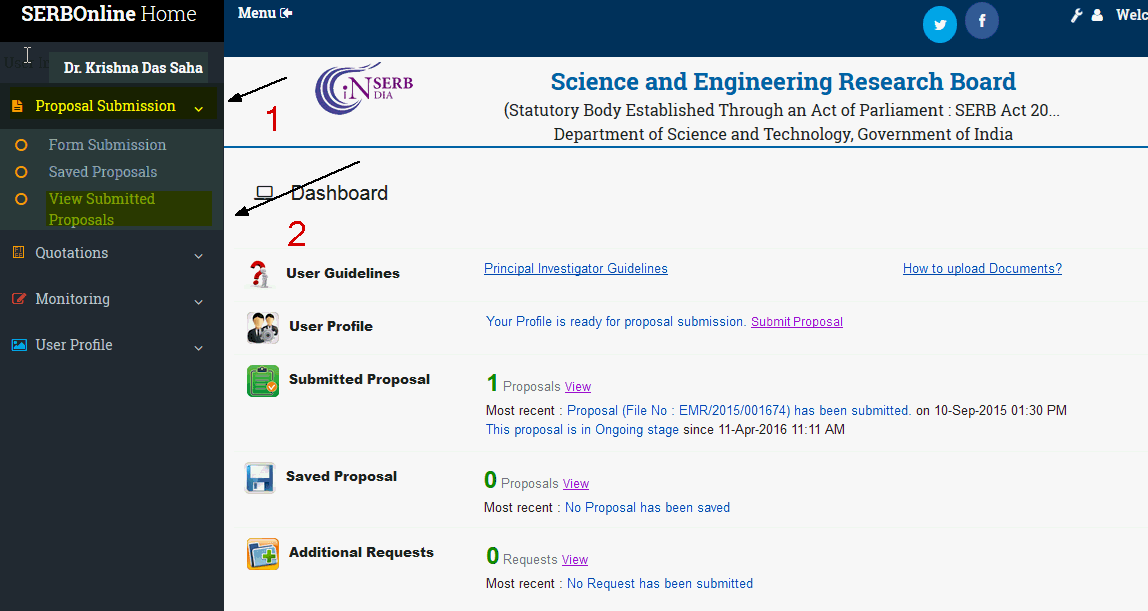
Figure 7.1
Step 2:
As shown in figure 7.2:
Action 1: First select the project against which you want to submit SE/UC.
Action 2: Click on 'Upload SE/UC' button.
Action 3 : Click on 'Upload New SE' .
this will open a screen as shown in figure 7.3

Figure 7.2
Step 4:
As shown in figure 7.3:
Action 1: You have to select against which release you are uploading SE
Action 2: Select the institute which has issued the SE.
Action 3: Values in 'From Date' and 'To Date' will appear in corresponding field automatically, By default 'From Date' is Start date of the project for the first SE and for subsequent SE it will the next day date of 'To Date' of last submitted SE.
Action 4: You can also edit 'To Date' according to the SE issued by competent authority.
Action 5:
-
If you are uploading the SE for the complete financial year, then you have to upload both UC (Recurring and Non-Recurring ) for that financial year.
-
if you are uploading the last SE (for completion of project ), then also you have to upload both UC (Recurring and Non-Recurring ) for that financial year.
Action 6: After filling all the details when you click the button 'Preview and Submit' then screen will open as shown in Figure7.5
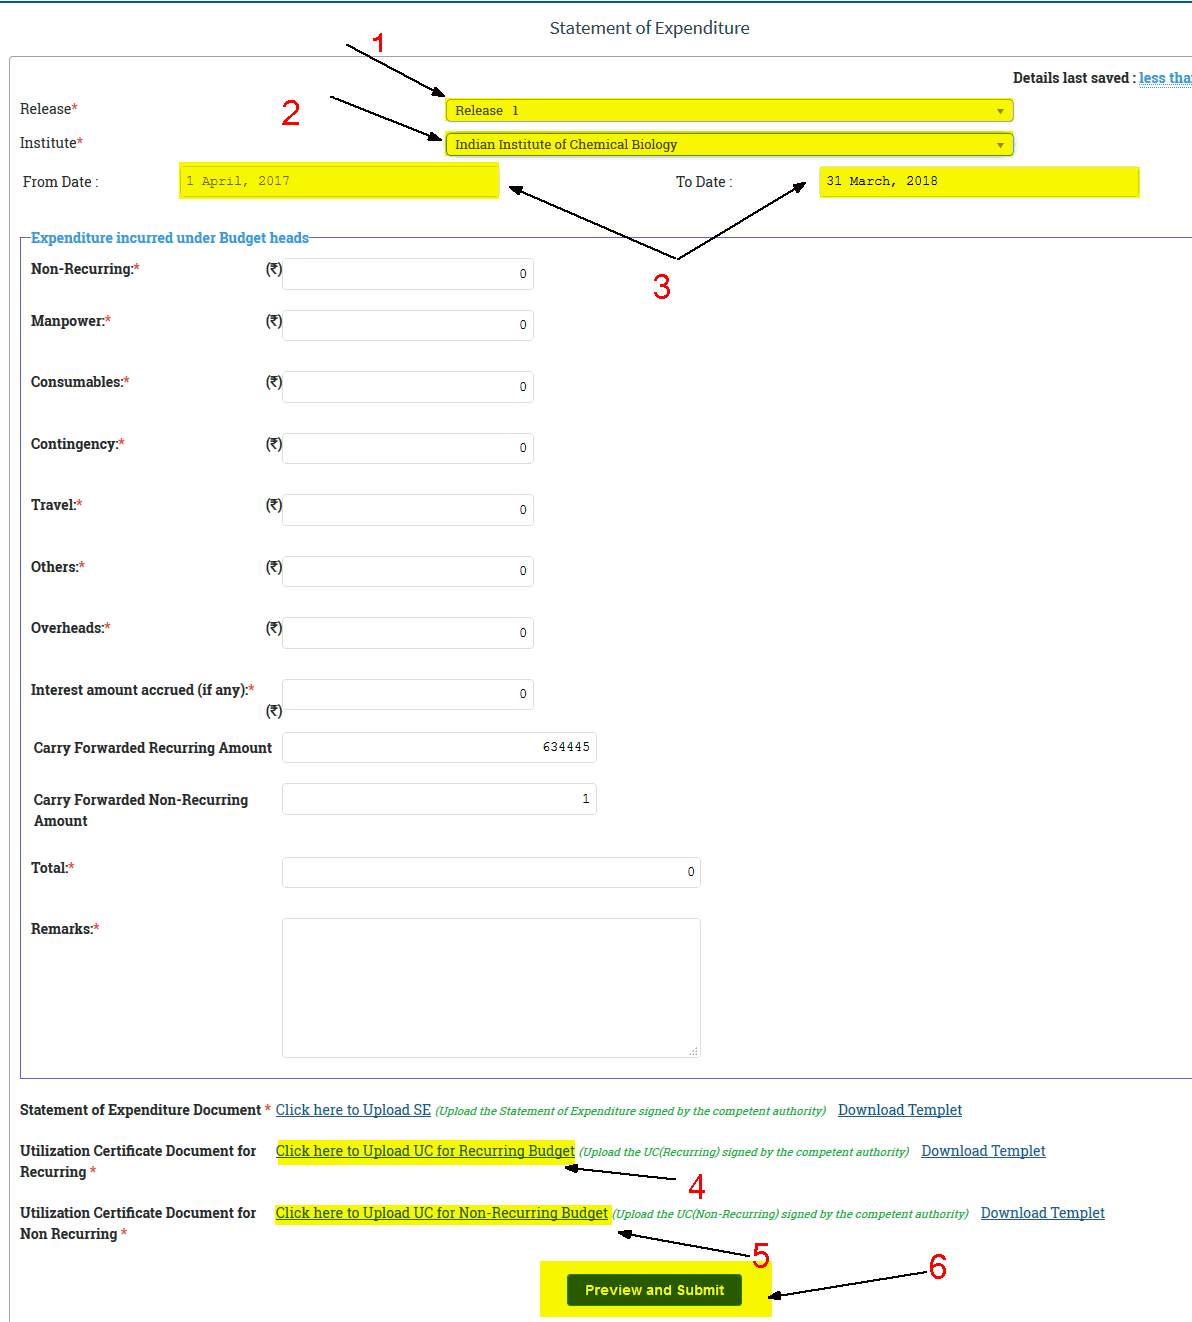
Figure 7.4
Step 6:
The next page will show you the preview of all the information filled by you. If you want to edit any information you can click on edit button in the bottom of the page this will redirect you to the previous page. Otherwise click on the submit button to submit your current SE/UC in to the system as shown in Figure 7.5
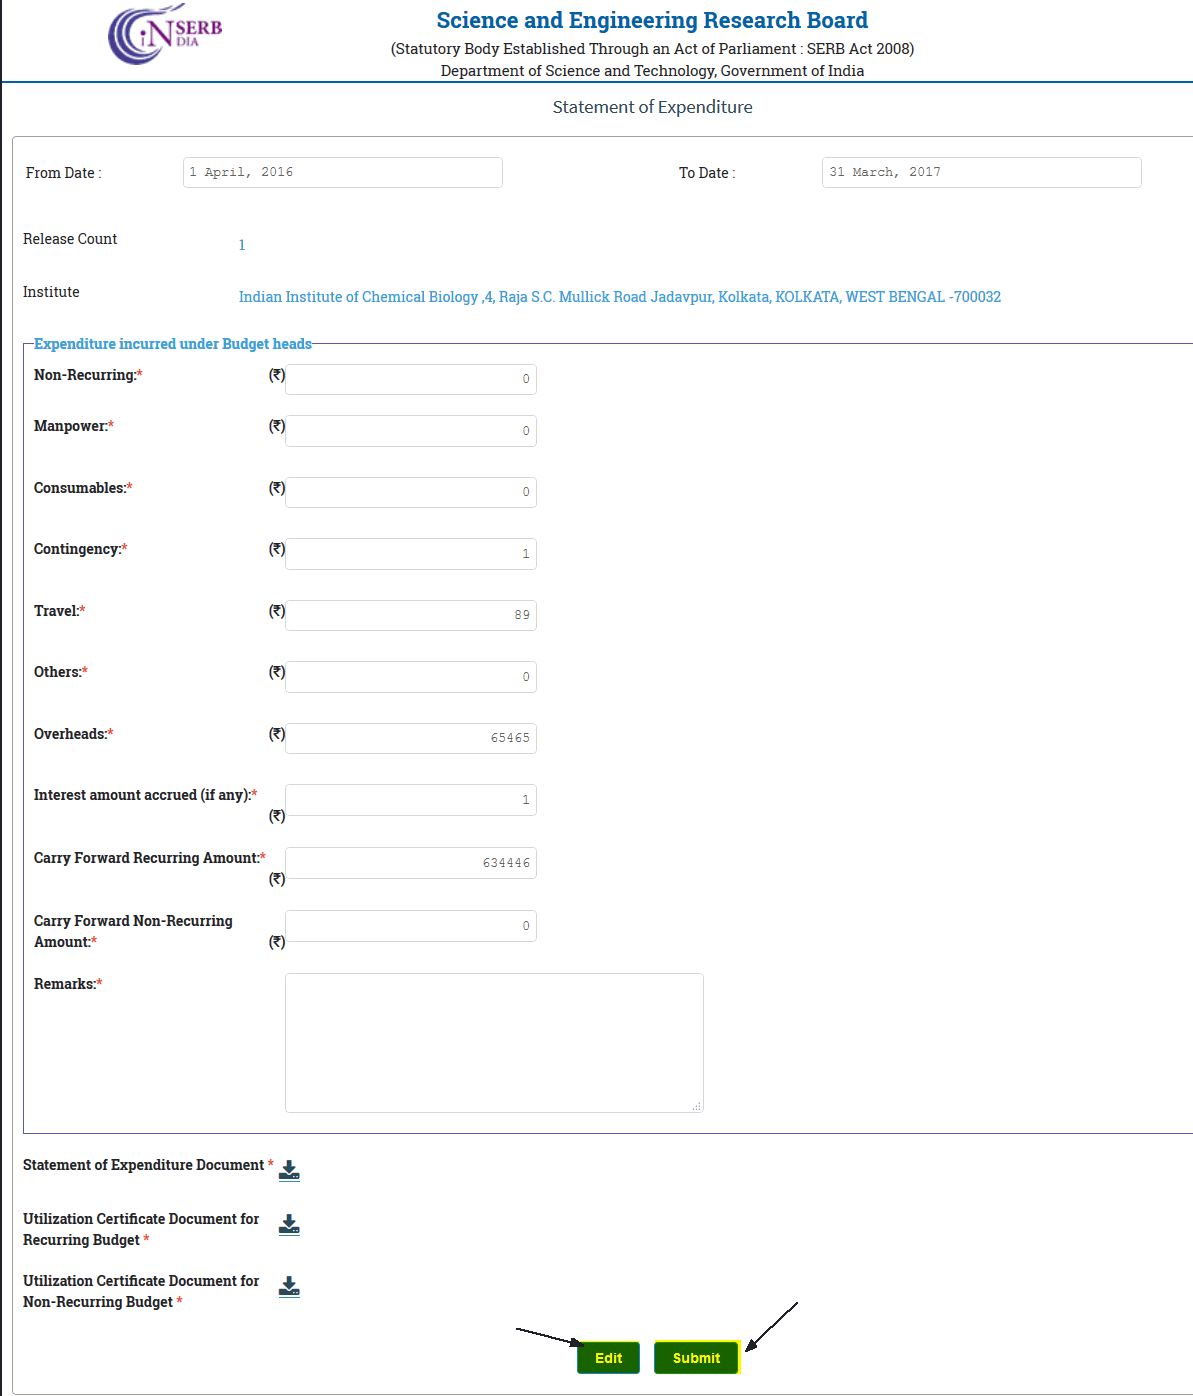
Figure 7.5
Step 8:
You can also see all submitted SE/UC in to the system for a proposal so far, To do so:
Action 1: Follow Step1 and Step 2
Action 2: Click on 'View Uploaded SE/UC'
As show in Figure 7.6
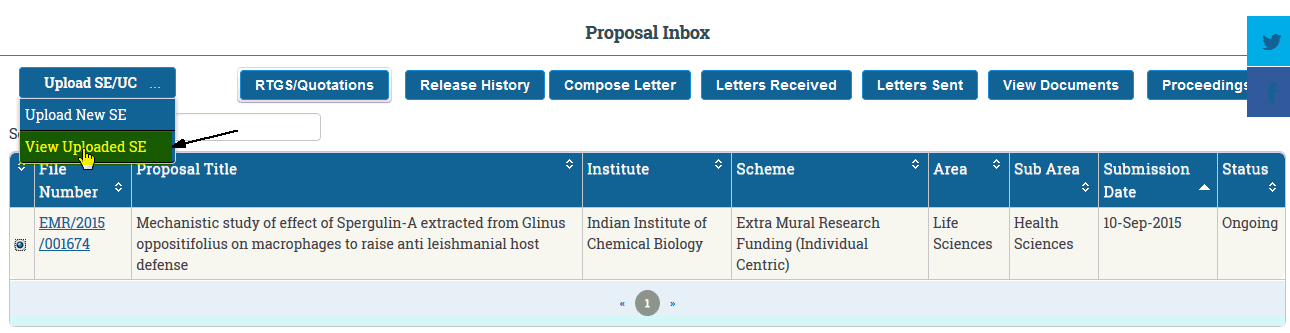
Figure 7.6
Step 9:
When you click on 'View Uploaded SE' this will show you the list of all submitted SE(s) and their corresponding UC as shown in Figure 7.8
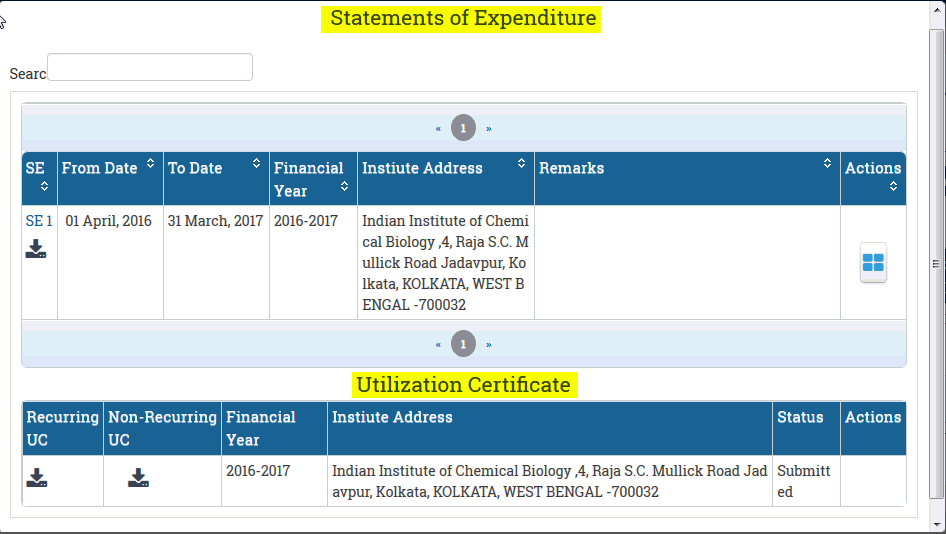
Figure 7.7